
Introduction #
I own an Anycubic Kobra 3 Max, and always disliked the “closed source” approach of the printer in comparison to other suppliers like Prusa. The Anycubic mobile app has a lot of imperfections, the translations are bad and the functions are limited. Something like the OctoApp would be much nicer - so I thought, it should be possible to “open source” my printer a little bit to feel more like owning it.
After some research, I stumbled over “Rinkhals”, which gives the possibility to use the OctoApp, the Orcaslicer, a neat web interface and so much more functions like mounting a NFS share or Remote Access to the display of the printer.
This guide summs up the setup for Rinkhals on my Kobra 3 Max - the setup process is already well described on Rinkhals Github, but I wanted to add some additional steps, options and tips.
From the offical Readme:
By using Rinkhals, you will keep all stock Anycubic features (print screen, Anycubic tools, calibration, …) and get even more, like:
- Mainsail, Fluidd (with Moonraker)
- USB camera support in Mainsail, Fluidd
- Prints from Orca will show the print screen
- SSH access for customization (user: root, password: rockchip)
- OTA Rinkhals updates
- Apps system (OctoEverywhere, Cloudflare, Tailscale, …)
Rinkhals setup #
Go to Github and download the latest release of Rinkhals for the Kobra 3 Max (can be found here: Github - Rinkhals releases).
The following steps are copied from the official Readme, as it is already perfectly described:
There are two options to install Rinkhals:
- Use the provided Rinkhals installer (named install-*.swu)
- Install the raw swu directly (named update-*.swu)
Either way, you’ll need to:
- Download the “update-k3m.swu” file from the “Assets” of the newest release (k3m = Kobra 3 Max)
- Rename the downloaded SWU file as update.swu
- Copy it in a directory named aGVscF9zb3Nf (…) on a FAT32 USB drive (MBR, GPT is not supported)
- Plug the USB drive in your printer
- The printer detects the file and should start installing it in the next 20 seconds.
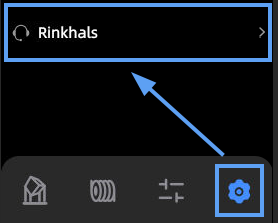
- After the installation, you will find a new button at the settings icon on your touch UI, named “Rinkhals”:
-
Using the Web GUI (Moonraker) #
- Now you are already able to connect to Moonraker through the IP address of your printer.
- To get your current IP address, make sure, that the printer is connected to WLAN.
- After connecting, you get your current IP at the settings icon, clicking on “Device Informations”:
-
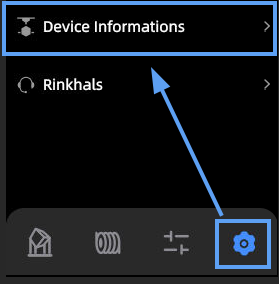
- Then open “Printer information”, and you will see your IP Adress on the bottom (Wi-Fi IP Address).
- Also, enable “LAN mode” in this step. When the printer is in LAN mode, you are able to print directly from Orcaslicer and still see the print on the screen of the printer. If not enabled, the current print stats will not show up on the screen!
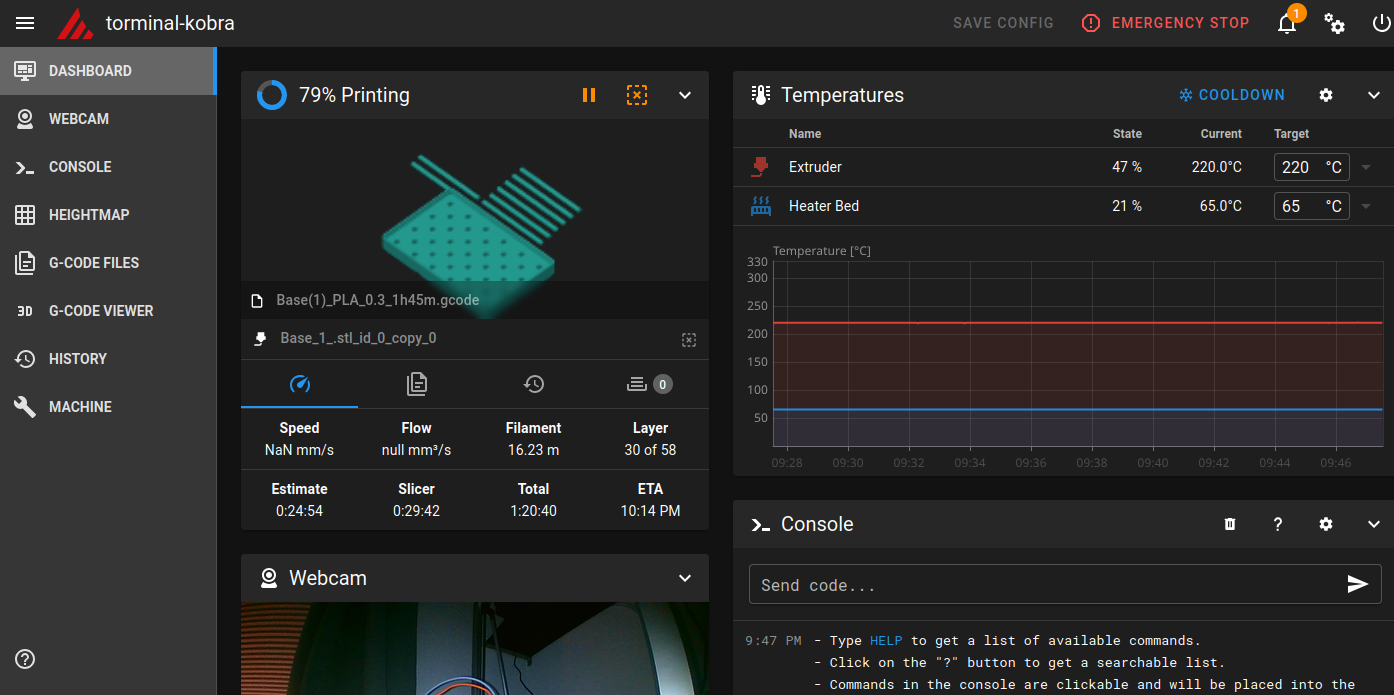
- Open the Web GUI in the following format in your browser, for example http://192.168.178.123 (use YOUR IP).
- Welcome to your new interface:
Connect with Orcaslicer #
- To connect the printer with Orcaslicer, open Orcaslicer and click the “Connection” symbol in the printer section at “Prepare”:
-
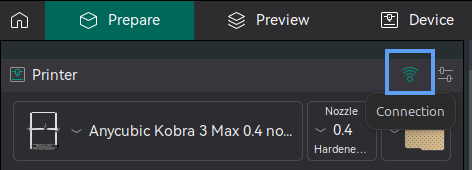
- Enter your IP address of your printer and the web url (url, where you get to Moonraker):
-
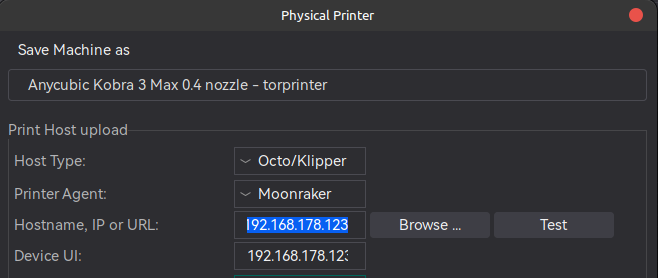
- Click “Test” to test the connection.
- If successfull, you are now able to send .gcode files to your printer and start printing directly.
- Hints:
- If you print directly from Orcaslicer, leveling or flowcontrol are not available. Use upload and start the print from the printer, to have those options available.
- If the Anycubic Kobra 3 Max Printerprofile is not available for you in Orcaslicer, update to a newer version (I am using 2.4.2 when writing this guide). The K3M was recently added.
- Orcaslicer has an issue since version 2.3.2, where prints are stuck at “preparation:Parsing. I wrote a guide for this problem: torminal.com/K3M Parsing fix
Connect with OctoApp #
Download the OctoApp from the Appstore:
- Open the app on your device
- Choose “Klipper” from the connection options:
-
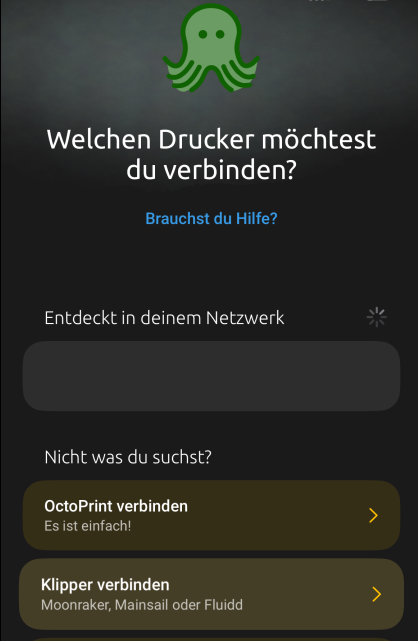
- Enter the IP of your printer (as before for the webinterface of Moonraker):
-
- After some time, it should connect and you get into the OctoApp interface:
-
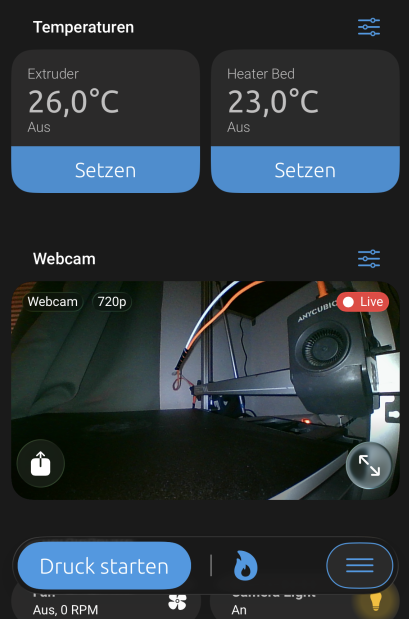
- Now you can play around! In my case, I mostly use the webcam or start prints remotely, when I am not at home.
- Tips:
- To access your printer when you are not at home / in your home network, you need a VPN. Tailscale is also available for Rinkhals.
- You can print all available .gcode files on the printer.
- It is also possible to execute Gcode from the App, for example to use Auto Bed Clearing (push print from the bed with the printinghead, guides can be found online)
Setup the Remote Display #
It is also possible to connect to the display of the printer with VNC. You need to enable it in the Rinkhals options on the printer first:
- Open the Rinkhals application on the printer as before
- Click on “Manage Apps”
- Set a checkmark on “50-remote-display”
-
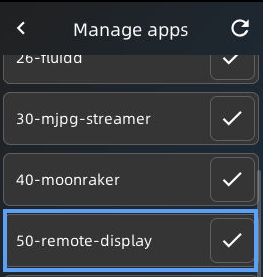
- Now you can access the display in your browser. Open the IP of your printer on port 5800, for example: http://192.168.178.166:5800/
Home Assistant integration #
You can integrate the printer in Home Assistant through Moonraker. Really helpful to integrate the webcam in your dashboard:
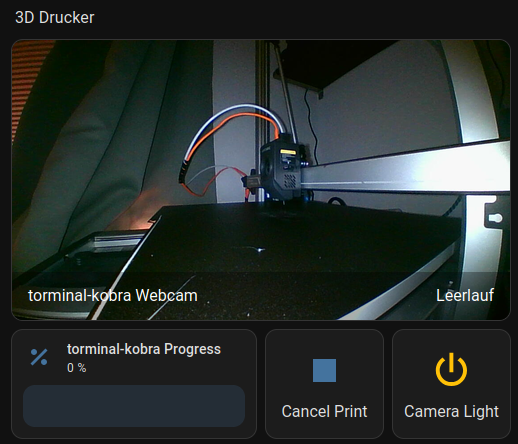
The installation is done inside HACS (Home Assistant Community Store). If you don’t have HACS, you must install it before adding this integration. Installation instructions here.
- Once HACS is installed, search for moonraker
- Navigate to the ‘Integrations’ tab in HACS, click explore & Download and search for the ‘Moonraker’ integration there.
- On the next screen, select “Download”. Once fully downloaded, restart HomeAssistant.
In the sidebar, click ‘Configuration’, then ‘Devices & Services’. Click the + icon to add “Moonraker” to your Home Assistant installation.
- Enter the host or IP of your Moonraker installation.
- Change your printer’s port if you don’t use the default of 7125.
- Optionally enter your API key if you have required one in Moonraker.
- Optionally specify your printer’s name if you don’t want to use the hostname of your moonraker installation.
Help - I broke something #
If something goes wrong and you need to reset your printer, Rinkhals kindly provides the stock firmwares for the printer on Firmwareforge: rinkhals.firmwareforge.org You can install it like you installed Rinkhals, more informations can be found here: Installation and firmware updates
Conclusion and more options #
Rinkhals adds the freedom of the opensource community to the K3M perfectly. You can do a lot more stuff with it, some inspiration:
- Obico (formerly TheSpaghettiDetective): automatic Spaghetti detection for your prints, which works with Moonraker. More information: Github - Obico
- More Apps for Rinkhals: Github - Rinkhals.Apps
- Can be installed in the App Store in Rinhals itself
- WebUI for Rinkhals (managing the ACE Pro, which is not possible from the Remote Display): Github/Rinkhals.WebUI
- Rinkhals Timelapse for your prints: Github/rinkhals-timelapse
- Spoolman: Keep track of your inventory of 3D-printer filament spools. Integrates with Moonraker: Github/Spoolman
Please note, that most of these options are not tested by me (yet). I will eventually expand this guide the further I get.
Feel free to leave a comment below if you encounter any problems or want to add something to this guide (no registration required).